Showing posts with label making. Show all posts

Saturday, November 13, 2010

Winemaking 101: Part 2

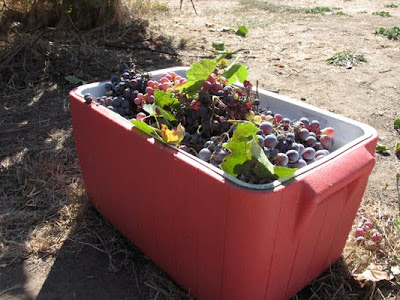
So you've got grape juice fermenting in a cooler. It's been about two weeks, so you should start checking to see how much longer the juice needs to ferment.

Materials List for checking the juice: Hydrometer, graduated cylinder

Put some of the juice into the graduated cylinder. You want to make sure there is no grape skins or seeds in the cylinder, so cover the top and slowly let the juice through your fingers and into the cylinder. Put the hydrometer in. Make sure it isn't touching the sides of the cylinder when you read it.

Once it reads zero, you are ready for the next step.

Materials list for transferring containers: A large pot or two, a colander, a funnel, carboys, airlocks, stops big enough for the carboy tops with a hole in it for the air lock, oak chips.

First start straining out the seeds and skins.

If you like, squeeze the skins to get every drop of juice.


Discard skins and seeds.

Pour the juice into the carboy until the juice reaches where the bottle starts to slope in. You need to make sure there is some room for the oak chips.


Take your oak chips and pour them into the carboy. You want there to be at least a quarter inch to half inch layer in the bottle. Make sure that there is very little extra space in the carboy. If there is too much oxygen in the bottle, the wine will become vinegar.

Place the stopper and airlock into the top of the carboy. I breath into the bottle a little to get rid of some of the oxygen.


Once the oak chips settle, we'll move onto the next step.

Tuesday, October 26, 2010

Winemaking 101: Part 1

This is my third year making wine. I've done it using the fewest materials possible with as little money as possible. The first year I got 11 bottles. The second year, I ended up with 32 bottles. This year... I estimate 10-11 bottles. The merlot grapes dried up while I was in New Zealand. But the Zinfandel grapes were in decent shape.

Official Disclaimer: This is how I make wine. I take no responsibility for the quality of wine that could be made with these directions.

Materials List: Cooler, garbage bag that is big enough to put between the cooler and its lid,

Step 1: Find wine grapes. The giveaway is that they are all juice and seed. Eating grapes have pulp. Harvest grapes. If you don't have a refractometer (ideally you would have 22 degrees brix) you can pop open a grape. You want the seed to be completely brown and your fingers should be sticky. Last year I had to harvest early because the grapes started to raisin.

Next sort out the good grapes. Remove all the stems. DO NOT WASH THE GRAPES. The yeast is on the grape skins.

Squish grapes. I do it with my hands in a large pot. Dump grape skins, seeds, and juice into a clean cooler and seal the top. I put a garbage bag between the juice and the lid. Let it sit a day or two before you punch it down. This involves opening up the cooler once a day a pushing all the grape skins into the juice. Mold sometimes grows on the lid. Just wipe it off. You're good as long as the mold isn't in the wine. Ideally, the cooler would be in a basement or a consistently cool area. 68 is ideal.


After two weeks, start measuring the sugar content with a hydrometer. You are waiting for it to tell you that the sugar content is zero. Unfortunately, I can't find my hydrometer at the moment, so I need to go get one sometime next week.

Related Posts Plugin for WordPress, Blogger...